Unconventional way to solve column comparison issue in BODS
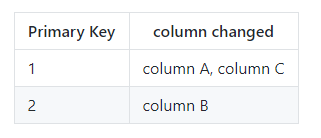
We had a request from an internal customer that they need to compare two tables to see what records are inserted, deleted and updated. These tables contain thousands of records, therefore it is not manageable for a person to do this work. For this purpose, Business Object Data Service (BODS) table comparison transform and Map operation transform can identify table level change (please check my previous blog ). Customer also want to detail what particular columns were changed in the format like
The original method I can think is to join two table together and use decode function to identify the column with difference, then use case transform to isolate those columns, followed by merge transform to collect the info. We ended up with this
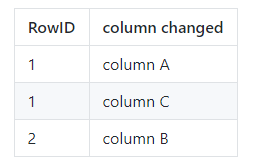
Plan is to either use BODS pivot transform or SQL transform to pivot the column changed to format customer requested
My colleague shared me a smart yet unconventional way to solve this multi-step processes just in one transform. I think this trick is really good and worth time to record there.
Here I use two example customer tables to show what happened
Create previous customer table
Create current customer table
Based on info, we know customer 1 did not changed, we used it as negative control; Customer 2 changed name from Jenny to Jennifer; customer 3 changed City from Philly to Seattle; customer 4 changed both name and city info. Now, let us see how we identify those to the request of customer.
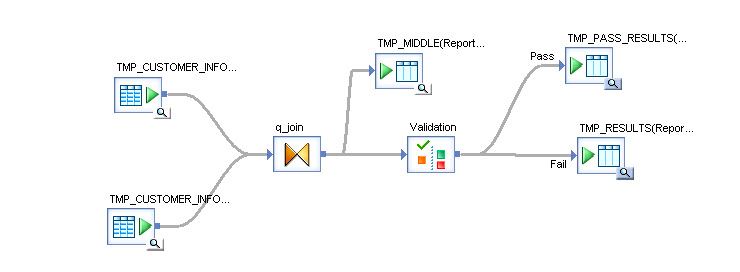
This is the first data flow I built. You will see it contained a query transform and validation transform and a couple of template table. This gives you an overview.
We first join this two table using query transform (q_join) with inner join and join with the customerID
We brought in customerID, this can be from either previous or current table, they are the same.
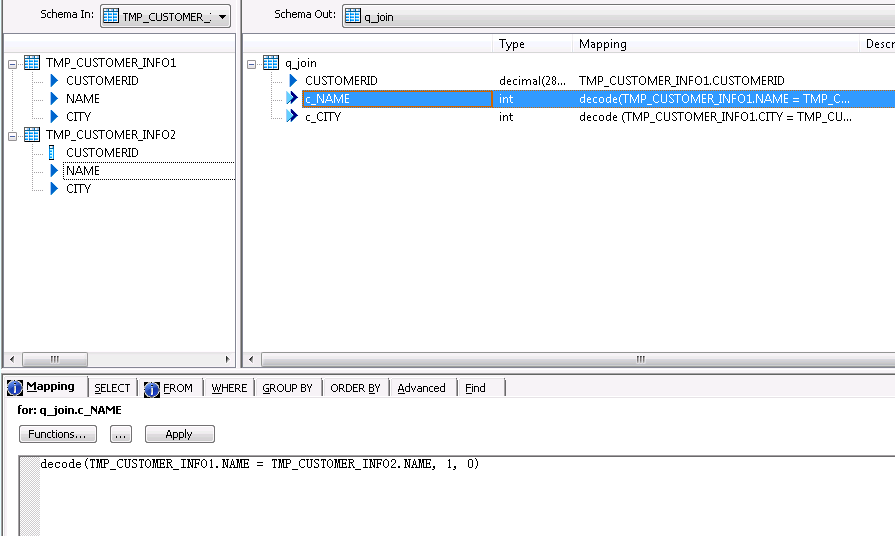
Now, we add two columns to show the comparison result of name and city. In the image below, I use c_NAME and c_CITY. The function I used is decode, ie, if both tables have the same value in the same column, I will assign value 1, otherwise, I will assign value 0.
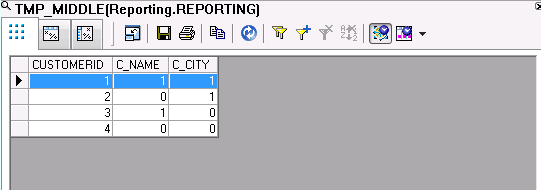
If you hook up with a template table now with the query transform. you will see the followings.
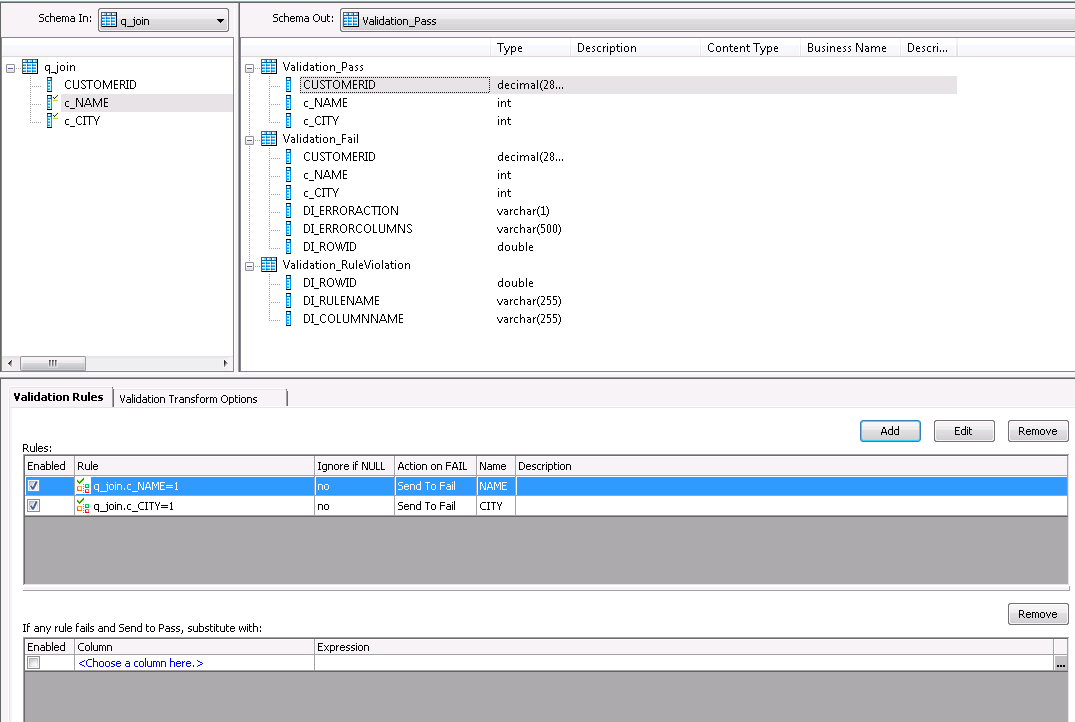
Magic actually happened in the validation step, where we created two rules
It is hard for me to understand initially, over the time, I understand that rules set up in the validation step is “AND” relationship. Any of them gets violated, the record will be sent to fail path. Here, we set rule as c_CITY =1 and c_NAME =1. Only the record meets all rules will send pass path.
We linked the success path and fail path to two template tables. Let us run the job and see what happened.
On the left, it is success path which only contain customer 1 because he has no changes. The rest customer who has changes is in the fail path. Interesting part is BODS generates a DI_ERRORCOLUMNS in the fail path. If you take a look at this system generate column, it actually contains the info we wanted (Yes, we need some string operation on it, but the components are there).
The last step is we add a query transform behind the validation step and use replace_substr function to replace “Validation failed rules(s):” with “”, replace prefix “c_” with “” for the column name, replace “:” with “,”.
The final data flow looks like this
The final result is
I need to give credit to my colleague, Goutham, for this wonderful trick.
Hope you enjoy this post.
Wenlei
The code to generate the dummy data can be downloaded here. You might need to make slight modification if you use database other than Oracle.

